LOOKING FOR SOMETHING
41 results found with an empty search
- How to Create a Stunning Fall Centerpiece for Your Kitchen Island
As the leaves begin to change and the air gets crisper, it’s the perfect time to bring the warm and cozy feeling of fall into your home. One of the best ways to do this is by creating a beautiful fall centerpiece for your kitchen island. This guide will show you how to effortlessly combine an electric table lamp, a candle, fall florals, and a decorative bowl with filler to create a stylish and functional centerpiece that’s sure to impress. Materials You’ll Need: Electric Table Lamp : Choose a lamp that complements your kitchen’s color scheme and has a warm, inviting glow. Candle : A fall-scented candle, such as pumpkin spice or apple cinnamon, will add a lovely aroma and a cozy ambiance. Fall Florals : Select a mix of artificial or dried fall flowers, such as sunflowers, mums, and wheat stalks. You can also add some faux fall leaves for extra color. Decorative Bowl : Opt for a bowl that has a rustic or seasonal design, such as ceramic or wood, to enhance the fall theme. Bowl Filler : Fill the bowl with items like pinecones, acorns, small pumpkins, or gourds to complete the look. Step-by-Step Guide: Choose the Right Location Start by selecting the best spot for your centerpiece on your kitchen island. It should be positioned where it’s both functional and visually appealing, without taking up too much workspace. Set the Foundation with the Table Lamp Place the electric table lamp as the focal point of your centerpiece. The lamp not only adds height to the arrangement but also creates a warm, welcoming light that enhances the cozy fall vibe. Ensure the lamp’s base is sturdy, and its design matches the fall theme. Add the Candle for Ambiance Place the candle next to the lamp. You can choose a candle in a decorative holder that complements the overall look. The candle will add a soft glow and a touch of warmth, especially in the evenings. If you’re concerned about safety, consider using a flameless LED candle. I LOVE this one from amazon! Incorporate Fall Florals Arrange the fall florals around the base of the lamp and candle. You can use a small vase or simply lay the florals down to create a more casual, natural look. Make sure the flowers and leaves cascade a bit over the edge to give the centerpiece a fuller, more abundant appearance. Position the Decorative Bowl Place the decorative bowl filled with fall-inspired items like pinecones, acorns, and small pumpkins next to the lamp and candle. The bowl filler should echo the colors and textures of the fall florals, tying the entire centerpiece together. Balance and Adjust Take a step back and view the centerpiece from different angles. Adjust the elements as needed to ensure balance. The lamp should be the tallest item, with the other pieces gradually tapering down in height. Final Touches To add a final touch of elegance, consider sprinkling a few extra pinecones or faux leaves around the base of the centerpiece. This will create a more cohesive and finished look. Tips for a Lasting Centerpiece: Use High-Quality Faux Florals : Investing in good-quality artificial flowers will ensure your centerpiece looks fresh and vibrant throughout the entire fall season. Mix Textures : Incorporating different textures, like smooth ceramic, rough pinecones, and soft florals, will add depth and interest to your arrangement. Keep It Functional : While it’s important for the centerpiece to be beautiful, it should also be practical. Ensure there’s still plenty of room on your kitchen island for food prep and daily activities. Conclusion Creating a fall centerpiece for your kitchen island is a simple yet effective way to bring the beauty of the season into your home. By combining an electric table lamp, candle, fall florals, and a decorative bowl with filler, you can craft a centerpiece that’s not only visually stunning but also functional and inviting. Enjoy the warm, cozy ambiance this centerpiece will bring to your kitchen all season long! Feel free to share your own fall centerpiece creations in the comments below—I’d love to see how you’ve styled your kitchen for the season! If you’re interested in creating your own fall centerpiece! CLICK HERE for everything I used!
- Avoid These 3 Common Design Mistakes in Your Living Room
Your living room is the heart of your home, a place where you relax, entertain, and make memories. Ensuring it is both stylish and functional can transform your entire home environment. However, there are a few common design mistakes that can undermine your efforts. Let's look at three key areas: furniture layout, rug size, and accent lighting, and how to avoid pitfalls to create a welcoming and harmonious space. 1. Furniture Layout Mistake : Pushing all furniture against the walls. It's tempting to maximize floor space by placing all your furniture against the walls, but this can make your room feel disconnected and uninviting. Instead, think about creating cozy conversation areas. Group seating together and arrange pieces to facilitate interaction. Solution : Pull your furniture away from the walls and arrange it to encourage conversation and a natural flow of movement. For instance, place your sofa and chairs around a central coffee table. This setup not only makes the space more inviting but also helps in defining the function of different areas within the room. 2. Rug Size Mistake : Choosing a rug that is too small. A rug that is too small can make your room feel fragmented and out of proportion. It's essential that your rug fits well within the space and anchors the furniture. Solution : Ensure your rug is large enough to fit at least the front legs of all major pieces of furniture, or better yet, all the legs. This creates a cohesive look and helps define the space. For example, in a seating area, the rug should extend beyond the coffee table and under the front legs of the sofa and chairs. This makes the room feel more grounded and pulled together. 3. Accent Lighting Mistake : Relying solely on overhead lighting. Overhead lighting alone can create harsh shadows and an uninviting atmosphere. A well-lit room requires a mix of lighting sources to create a balanced, warm ambiance. Solution : Incorporate multiple light sources. Use a combination of floor lamps, table lamps, and wall sconces to add layers of light. This not only makes the space more functional but also adds depth and warmth. For example, place a floor lamp next to a reading chair, add a table lamp on a side table, and install sconces to highlight artwork or architectural features. Conclusion By paying attention to these common design mistakes, you can create a living room that is both functional and aesthetically pleasing. Remember, the key to a great living room design is in the details—arranging furniture to encourage conversation, selecting the right-sized rug to anchor the space, and layering your lighting to create a warm, inviting atmosphere. Happy decorating! Share Your Thoughts Have you made any of these design mistakes? How did you fix them? Share your experiences in the comments below! #InteriorDesign #LivingRoomTips #HomeDecor #DesignMistakes #CozyHome #LightingDesign #FurnitureLayout #RugSize
- Transform Your Bedroom with Amazon: An Interior Designer's Guide
Welcome to the world of interior design! Today, we’ll dive into transforming your bedroom using Amazon products. Whether you’re looking for a complete overhaul or just a few upgrades, Amazon offers a plethora of options to create a designer-worthy space. Step 1: Define Your Style Before diving into shopping, it’s crucial to define your style. Are you drawn to modern minimalism, rustic charm, bohemian vibes, or classic elegance? Knowing your preferred style will guide your choices and ensure a cohesive look. Step 2: Choose a Color Palette Selecting a color palette sets the tone for your bedroom. Opt for soothing hues like soft blues, warm neutrals, or muted greens for a calming ambiance. Amazon offers various paint options, peel-and-stick wallpapers, and color-coordinated decor items to help you achieve your desired look. Step 3: Invest in Key Furniture Pieces Bed Frame Your bed is the focal point of your bedroom. Choose a bed frame that aligns with your style. For a modern look, consider the Queen Platform Bed Frame 51.2" High Headboard Tall Upholstered Bed . Nightstands Nightstands add functionality and style. Look for options that offer storage and match your bed frame. The Anmytek 3 Drawer Dresser is perfect for a sleek, minimalist look. Step 4: Add Soft Furnishings Bedding Invest in high-quality bedding for comfort and style. The Bedsure White Duvet Cover Queen Size - Soft Double Brushed Duvet Cover offers a luxurious feel without breaking the bank. Pillows and Throws Mix and match pillows and throws to add texture and color. The Foindtower Pack of 2, Curly Faux Fur Decorative Throw Pillow come in various colors and patterns to suit any style. Step 5: Incorporate Lighting Lighting plays a significant role in creating ambiance. Opt for a combination of ambient, task, and accent lighting. Table Lamps The JONATHAN Y JYL4026A Julian 29" Ceramic LED Table Lamp adds a modern touch and provides soft, warm light. Step 6: Add Personal Touches Artwork Personalize your space with artwork. The Pinetree Art Framed Canvas Wall Art offer a variety of prints to suit any style. Rugs A rug can tie the room together Loloi Layla Collection, LAY-03, Olive/Charcoal, 7'-6" x 9'-6", 13" Thick, Area Rug, Soft, Durable, Vintage Inspired offers a blend of style and comfort. Final Touches Complete your bedroom transformation with finishing touches like stylish mirrors, decorative trays, and storage baskets. The Madison Park Signature Wall Décor can make your room feel larger. Conclusion With a clear vision and the right products, you can transform your bedroom into a designer haven using Amazon. Happy decorating! Feel free to customize this post with additional personal tips or product recommendations to match your unique style and preferences. Click HERE to shop on amazon!
- Three Tips on Kitchen Decor
The Importance of Decluttering and Styling Your Kitchen Sink Area As an interior designer, I often emphasize the significance of every detail in creating a harmonious living space. One of the most overlooked areas in the kitchen is the sink area. A cluttered and unstyled sink can detract from the overall aesthetics of your kitchen. Here are three easy steps to transform your kitchen sink area into a stylish and functional space. 1. Declutter: Organize with Cleaning Caddies and Under Sink Storage The first step to a visually pleasing kitchen sink area is decluttering. Remove unnecessary items and keep only the essentials within easy reach. Invest in a cleaning caddy to store sponges, brushes, and dish soap neatly. Under sink storage options, such as pull-out drawers or baskets, can help keep cleaning supplies organized and out of sight. This not only enhances the appearance of your sink area but also makes it easier to maintain cleanliness. **Tips:** - Regularly assess what you truly need around the sink and store or discard the rest. - Use containers or bins to categorize items under the sink, making them easier to find and access. 2. Streamline: Replace Branded Bottles with Cohesive Alternatives Branded bottles and containers can create visual noise, disrupting the cohesive look of your kitchen. Instead, opt for streamlined and aesthetically pleasing alternatives that match your decor. For example, decant dish soap into a stylish dispenser and choose uniform containers for hand soap and lotion. This small change can significantly impact the overall look of your sink area. **Tips:** - Choose containers in colors and materials that complement your kitchen’s design. - Label your containers subtly, if necessary, to avoid confusion. 3. Add Decorative Pieces: Faux Florals and Reed Diffusers Once your sink area is decluttered and streamlined, it's time to add some decorative touches. Incorporating a few well-chosen items can elevate the space and make it feel more intentional. I recommend adding a faux floral arrangement and a reed diffuser. Faux florals bring a touch of nature without the maintenance, while a reed diffuser adds a pleasant scent and a touch of elegance. **Tips:** - Choose faux florals that mimic real plants for a natural look. - Select a reed diffuser with a scent that complements your kitchen’s ambiance. Final Thoughts A well-styled kitchen sink area can enhance the overall aesthetic and functionality of your kitchen. By following these three simple steps—decluttering, streamlining with cohesive containers, and adding decorative pieces—you can transform this often-overlooked space into a stylish focal point. Remember, the key is to create a balance between practicality and aesthetics, ensuring your kitchen sink area is both beautiful and functional. Happy styling! Click to shop! If you're looking to upgrade your kitchen sink area without breaking the bank, Amazon offers a variety of affordable options that can help you achieve a stylish and functional space. Here are some recommendations
- 3 Ways to Upgrade Your Builder-Grade Home on a Budget
As an interior designer, I often encounter clients who live in builder-grade homes and are looking for budget friendly ways to enhance their space. Builder-grade homes, while functional, often lack the unique touches that make a house feel like a custom home. Here are three budget-friendly upgrades that can make a significant impact on your home’s aesthetic and functionality. 1. Under Cabinet Lighting Why it matters: Under cabinet lighting is an easy and affordable way to add both style and functionality to your kitchen. It provides much-needed task lighting for cooking and food prep, and can also serve as ambient lighting in the evenings. How to implement: LED Strip Lights: These are easy to install and can be cut to size. They come with adhesive backing, so you can simply stick them under your cabinets. Plug-in Puck Lights: These small, round lights are perfect for those who prefer a more focused light source. They can be plugged into an outlet and typically come with mounting hardware. Battery-Operated Options: If you don’t want to deal with wiring, battery-operated lights are a great alternative. Many models come with a remote control for easy use. Cost: Depending on the type of lighting you choose, this upgrade can cost anywhere from $20 to $100. Tips: Opt for LED lights to save on energy costs and enjoy a longer lifespan. Choose a warm or neutral light color to create a cozy atmosphere. 2. Window Treatments Why it matters: Window treatments can dramatically change the look and feel of a room. They add a layer of softness, provide privacy, and can help control the amount of natural light entering your space. How to implement: Curtains and Drapes: These come in a variety of styles, colors, and fabrics. For a more custom look, hang them higher and wider than your windows. Blinds and Shades: These offer a more streamlined look and are great for controlling light and privacy. Consider bamboo shades for a natural touch or cellular shades for added insulation. DIY Options: If you’re handy with a sewing machine, consider making your own curtains. This can be a fun project and allows you to choose the exact fabric and style you want. Cost: You can find affordable options at stores like IKEA, Target, or Home Depot. Expect to spend around $50 to $200 depending on the number of windows and the style you choose. Tips: Use a double curtain rod to layer sheer and opaque curtains for versatility. Consider thermal or blackout curtains to improve energy efficiency and sleep quality. 3. Exterior Uplighting Why it matters: Exterior uplighting can transform the curb appeal of your home, making it look more inviting and highlighting architectural features. It also adds an element of safety by illuminating pathways and entryways. How to implement: Solar Lights: These are easy to install and eco-friendly. Place them along walkways, driveways, and garden beds. LED Spotlights: Use these to highlight trees, shrubs, or the facade of your home. They are energy-efficient and long-lasting. String Lights: For a more whimsical touch, string lights can be draped over porches, pergolas, or along fences. Cost: This upgrade can range from $30 for a set of solar lights to $150 for more extensive lighting setups with multiple fixtures. Tips: Focus on key areas such as the front door, garage, and any distinctive landscaping features. Choose weather-resistant fixtures to ensure longevity. Final Thoughts Upgrading a builder-grade home doesn’t have to break the bank. By focusing on small, impactful changes like under cabinet lighting, window treatments, and exterior uplighting, you can create a more personalized and stylish living space. These budget-friendly projects not only enhance the aesthetics of your home but also improve its functionality and comfort. Happy decorating! I linked some affordable options below that i love as an interior designer—click to HERE to shop! Or tap each photo individually!
- Transform Your Home with Decorative Boxes: A Stylish Solution to Hide Clutter
In today's fast-paced world, maintaining a tidy and organized home can be challenging. Everyday essentials like remote controls, lighters, and small gadgets often end up cluttering our living spaces. But fear not! As an interior designer, I have a simple yet effective solution: decorative boxes. These versatile pieces not only keep your space organized but also add a touch of style and elegance to your home decor. Why Choose Decorative Boxes? Decorative boxes are more than just storage solutions; they are design elements that enhance your home's aesthetic. Here are a few reasons why they are a must-have in every home: Versatility : Decorative boxes come in various shapes, sizes, and materials, making them suitable for any room and decor style. Functionality : They offer a practical way to store small items that tend to create clutter, such as remotes, lighters, and chargers. Aesthetic Appeal : With endless design options, decorative boxes can complement your existing decor and add a personal touch to your space. Choosing the Right Decorative Boxes When selecting decorative boxes, consider the following factors to ensure they meet both your functional and aesthetic needs: Size : Choose boxes that are large enough to hold your items but not so big that they dominate the space. Measure the items you plan to store to find the perfect fit. Material : Decorative boxes come in various materials, including wood, metal, fabric, and wicker. Choose a material that complements your decor style and is durable enough for everyday use. Design : From sleek modern designs to rustic vintage styles, there are decorative boxes to suit every taste. Consider your home's overall theme and color scheme when selecting designs. Creative Ways to Use Decorative Boxes Here are some creative ideas for incorporating decorative boxes into your home decor: 1. Living Room The living room is often the main gathering space in a home, making it prone to clutter. Use decorative boxes to store remote controls, coasters, and magazines. Place them on your coffee table or shelves for easy access while keeping the area tidy. 2. Bedroom In the bedroom, decorative boxes can be used to store jewelry, watches, and other small accessories. Place them on your dresser or bedside table for a chic and organized look. Opt for boxes with lids to keep your items dust-free. 3. Home Office Keep your home office neat and efficient by using decorative boxes to store office supplies such as pens, paperclips, and notepads. Stack them on your desk or shelves to create a stylish and functional workspace. 4. Bathroom In the bathroom, decorative boxes can be used to store toiletries, makeup, and hair accessories. Choose water-resistant materials like acrylic or metal to ensure durability. Place them on your vanity or open shelves for a spa-like feel. 5. Entryway The entryway is the first impression of your home. Use decorative boxes to store keys, sunglasses, and mail. Place them on a console table or a wall-mounted shelf to keep the area clutter-free and welcoming. Styling Tips for Decorative Boxes To make the most of your decorative boxes, follow these styling tips: Layering : Stack boxes of different sizes to create visual interest and maximize storage space. Grouping : Arrange boxes in groups of odd numbers (three or five) for a balanced and aesthetically pleasing look. Mix and Match : Combine boxes of different materials and designs to add texture and depth to your decor. Personal Touch : Add labels or tags to your boxes to keep track of their contents and add a personal touch. Conclusion Decorative boxes are a stylish and practical solution to hiding clutter in your home. By choosing the right size, material, and design, you can enhance your decor while keeping your space organized. Whether in the living room, bedroom, home office, bathroom, or entryway, these versatile pieces will help you create a clutter-free and beautiful home. Embrace the art of organization with decorative boxes and transform your living spaces into stylish and serene havens. Happy decorating! Feel free to reach out with any questions or for personalized interior design advice. I'm here to help you create a home that reflects your unique style and meets your practical needs. To shop decorative box options on Amazon— CLICK HERE!
- Target Living Room Design
One thing I know about my followers is that yall love Target just as much as i do! I designed this budget friendly neutral living room using ONLY Target home products! The entire design is under $2000, which is such a DEAL for a living room! I always keep my designs neutral so that you can accent them in colors that you love! I’m most obsessed with this couch! One of my instagram followers commented that she had recently purchased it and can attest to how great quality it is! I never shy away from a neutral couch! Timeless! My last ”highlight” item is this coffee table under $200! A total steal and I love the movement and spacing a round coffee table creates! Definitely check it out!
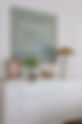
- How to: use a wall mirror to create larger spaces
If you live in a small home or apartment and need a simple and affordable, fix to make a space field larger than it is, then I would recommend you using a wall mirror . Interior designers have been using wall mirrors for years and years to create movement and light reflection that portrays a larger space in general. Wall mirrors are an interior designers “best friend” in smaller homes and can be the easiest and most cost effective way to make it appear larger. If you’re looking to add a wall mirror to your home, i would recommend placing the wall mirror either in the darkest corner of the room or across from the entrance to the room! Entryways and mantle areas are great places to utilize mirrors because of the light reflection they add to a space. Target is great place for beautiful and affordable wall mirrors. They are having a sale, so every item listed is at least 20% off! But even without a sale, they are worth the price! Very high quality! Heres some of my top picks that are ALL UNDER $100!
- Vintage Inspired Vases under $50!
Since the rising popularity of transitional interior designer like Amber Interiors, the use of vintage, aged decor has become increasingly popular. I love the small detail it adds and the sense of history it add to a space. Unfortunately, most of the time these vases can cost $200-$300! Cant afford. But i found the best vintage inspired vases the internet has to offer! check these out!
- Strawberry Basil Margarita
Besties, this is my new hyperfixation. If you love a margarita then this is the drink of the summer, trust me! It’s so refreshing, it’s my fav afternoon treat right now! Here’s the recipe for a single serving! 2 ounces tequila 1/2 ounce triple sec two tablespoons lime juice 5 strawberries couple of basil leaves tablespoon hot honey salted rim glass add strawberries, tequila, triple sec, lime juice, basil, and hot honey into a blender and add a few cubes of ice and blend until smooth. if youre extra like me, shake with ice into a cocktail shaker strain into a glass full of ice. ENJOY!! **for links to blender, glasses and everything used in this video click here! https://liketk.it/4cRwj
- How to: Declutter
As an interior designer, I’m constantly working in redecorating/ designing bedroom spaces. Bedrooms usually have a lot of furniture that contain essential items to daily life which in return can look to be a little “cluttered.” My easy fix to solve this cluttered issue is just by using a decorative tray to contain the items that gives a more clean and styled looks. In my opinion, my favorite place to purchase trays is from amazon! Heres a collective list of trays i know and love that are very affordable! Click HERE to shop decorative trays!
- Shower Shelves
Hey bestie! This is a total Prime Day find! I’ve been struggling in my shower area! It was always a little cluttered and unorganized and these acrylic shelves have been all over social media lately, so i decided to take a chance of them and what a WIN! Right now you can get two acrylic shelves for under $25! They are honestly HUGE and have drainage holes perfect for the shower! They only took me 5 minutes to set up! Click HERE to shop or tap the picture!